As soon as you start creating your account, you get the chance to set up your first booking page. You can create additional booking pages at any time later, all following a similar process to the initial setup. The booking page is fundamental for swiftly scheduling meetings. You have the option to send it via email, copy its link, or share it on a website. So, how to create a booking page? Just follow the steps.
#1 Step: Click on the “Create“ #
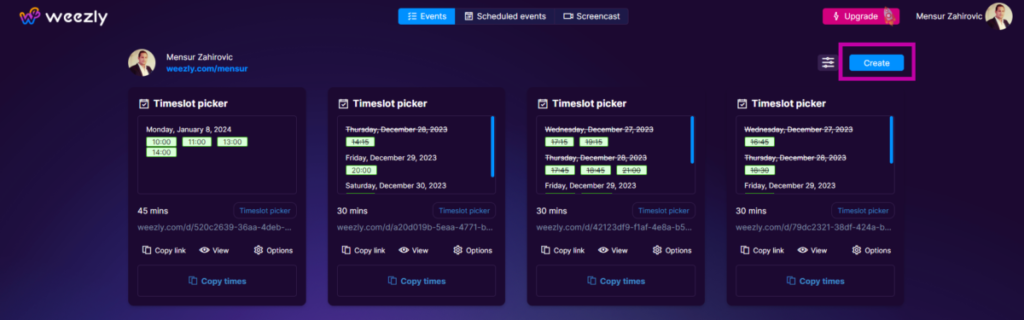
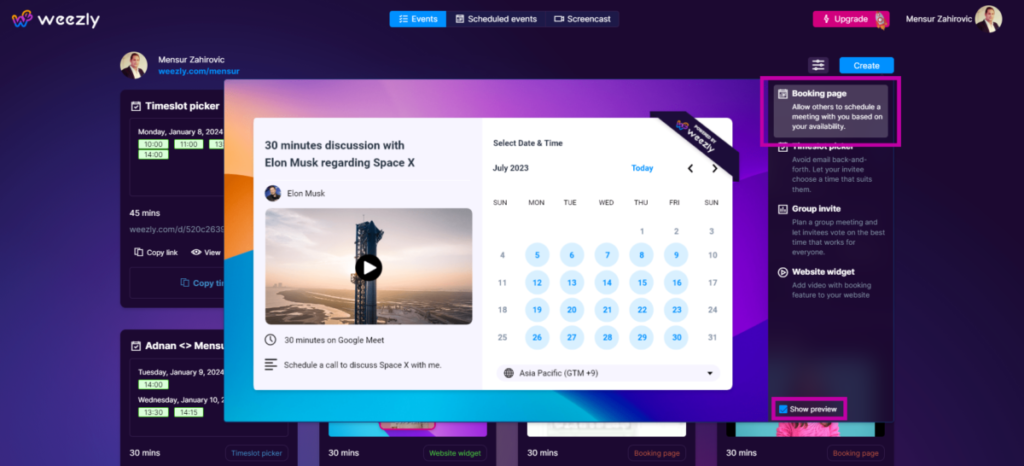
#2 Step: Choose Booking Page #
From the drop-down menu, select the “Booking page“. In the lower corner of the menu, you have a preview button that allows you to see what each event you create looks like. Use it to see if this is what you need.
#3 Create a booking page #
Now a new window will open in which you can create all the details related to the booking page.
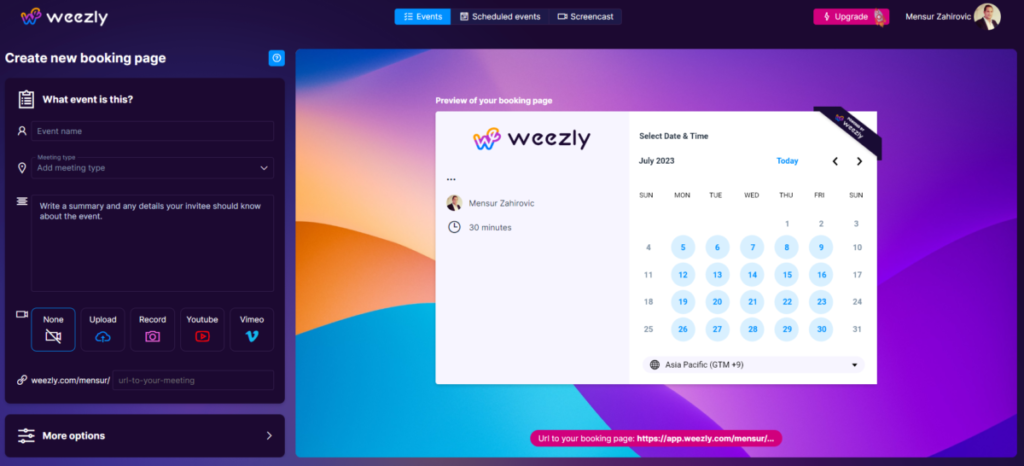
- Choose a name for your meeting.
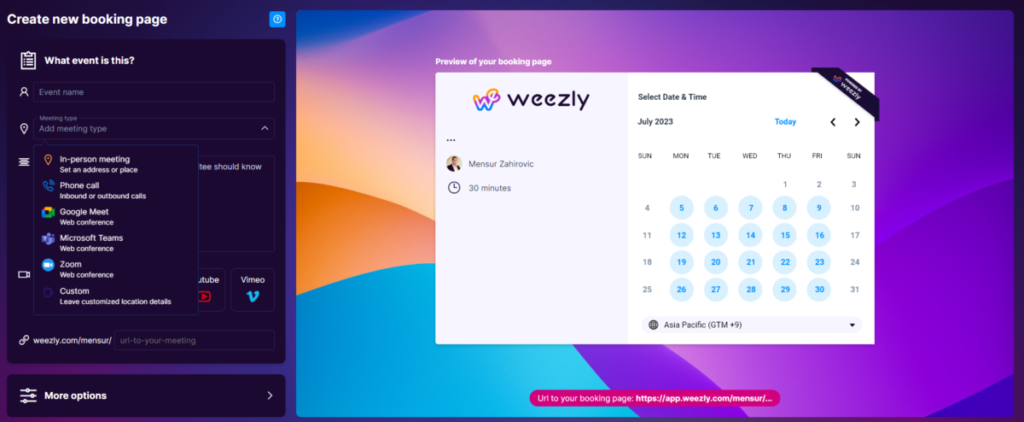
- Add meeting type.
- And describe what this meeting is about.
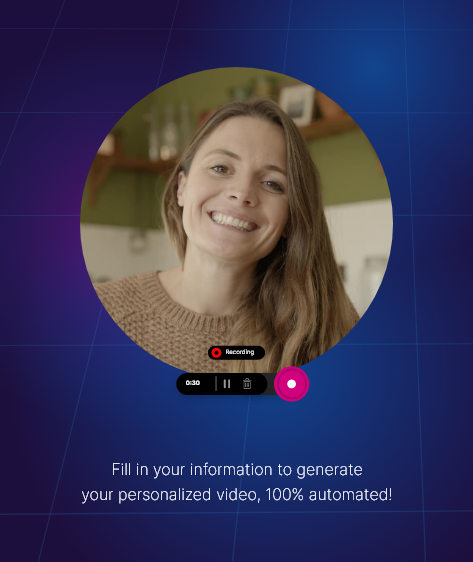
- Add video (Upload, Webcam, YouTube, or Vimeo)
- By default, the name you assign to the event will be used for the event link. However, you have the flexibility to modify it according to your preference.
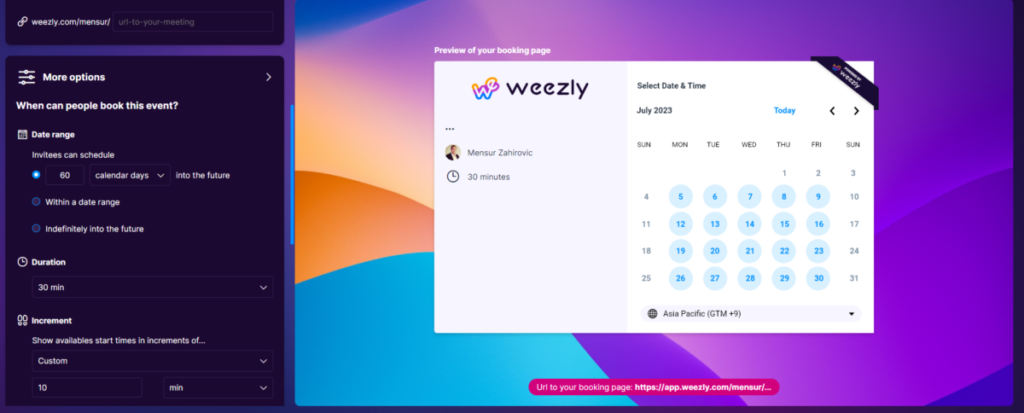
#4 More options #
- Next, you’ll have to select the date range for the event and determine its duration.
- Under “Date Range,” specify how far ahead guests are allowed to schedule appointments with you. You can choose a specific number of business or calendar days ahead, set a particular date range, or allow bookings indefinitely.
- Under “Duration” select the duration of the event. Options include 15, 30, 45, and 60-minute intervals, or choose the “Custom” option to set a unique minute or hour duration.
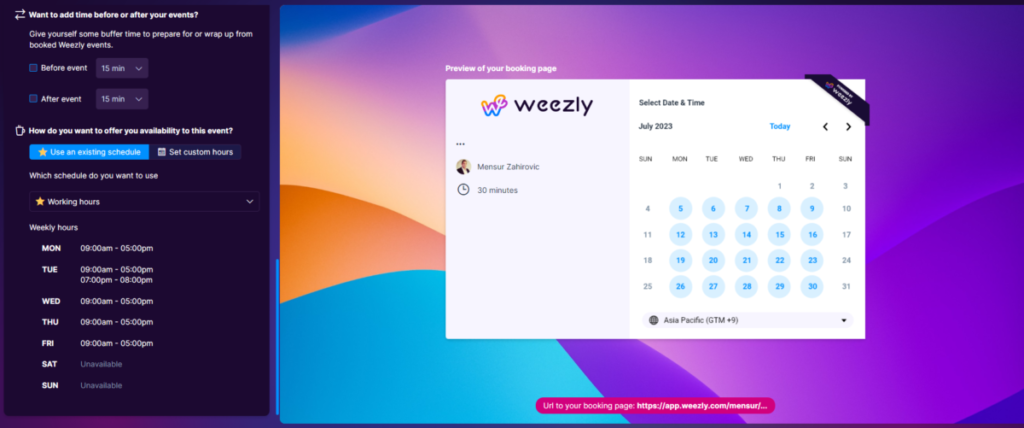
- The final required step involves deciding on your availability offering. You can utilize an existing schedule or opt for “Custom hours” to establish a new timeframe for accepting meetings. This schedule, combined with your connected calendar, will display available meeting times to invitees.
Upon signing up for Weezly, a default schedule of Monday-Friday, 9:00 am to 5:00 pm (09.00 to 17.00) is provided. If you opt for “Custom Hours,” you’ll be asked to input your availability in intervals. Instructions for this can be found here.
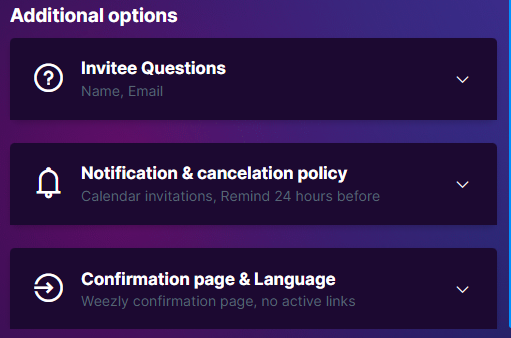
#5 Additional options #
One of the super features that allows you to never forget about the meeting refers to multiple reminders. Set follow-up questions, reminders, and other details.
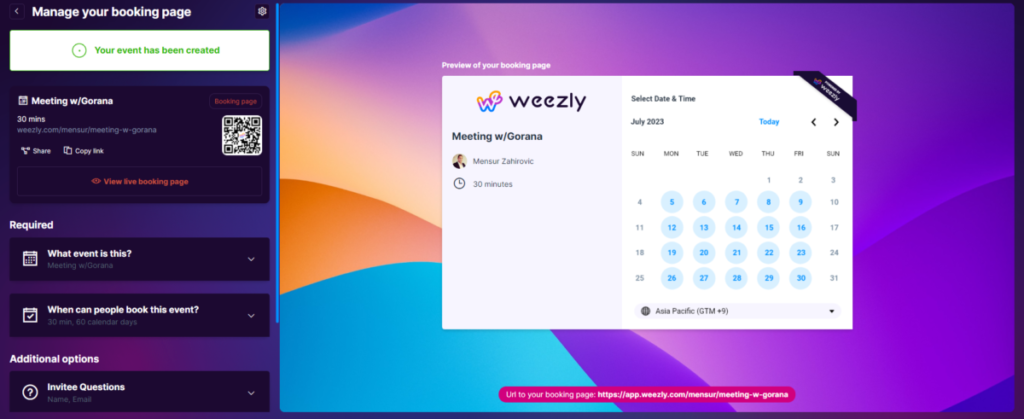
#6 That’s it – Click Save and Create! #
Save all the data you entered and click the Create button. A page with a booking link and ways to share will open.
That’s it – you’ve created your bookig page.