In today’s digital age, the ability to screen record has become an essential skill. Whether you’re a content creator, professional hosting webinars, or just someone who wants to capture a moment on their screen for posterity, knowing how to screen record on Mac with audio is invaluable. But how do you do it? And more importantly, how do you ensure you capture clear, crisp audio along with your video? In this guide, we’ll delve deep into the process, tools, and best practices.

Built-in Screen Recording with QuickTime Player
The macOS comes with a built-in screen recording tool: QuickTime Player. Here’s how you can use it:
Step-by-step Guide:
- Open QuickTime Player: Navigate to your Applications folder and open QuickTime Player. Alternatively, use Spotlight (
Cmd + Space) and type in ‘QuickTime Player’. - Initiate a New Screen Recording: In the menu bar, select
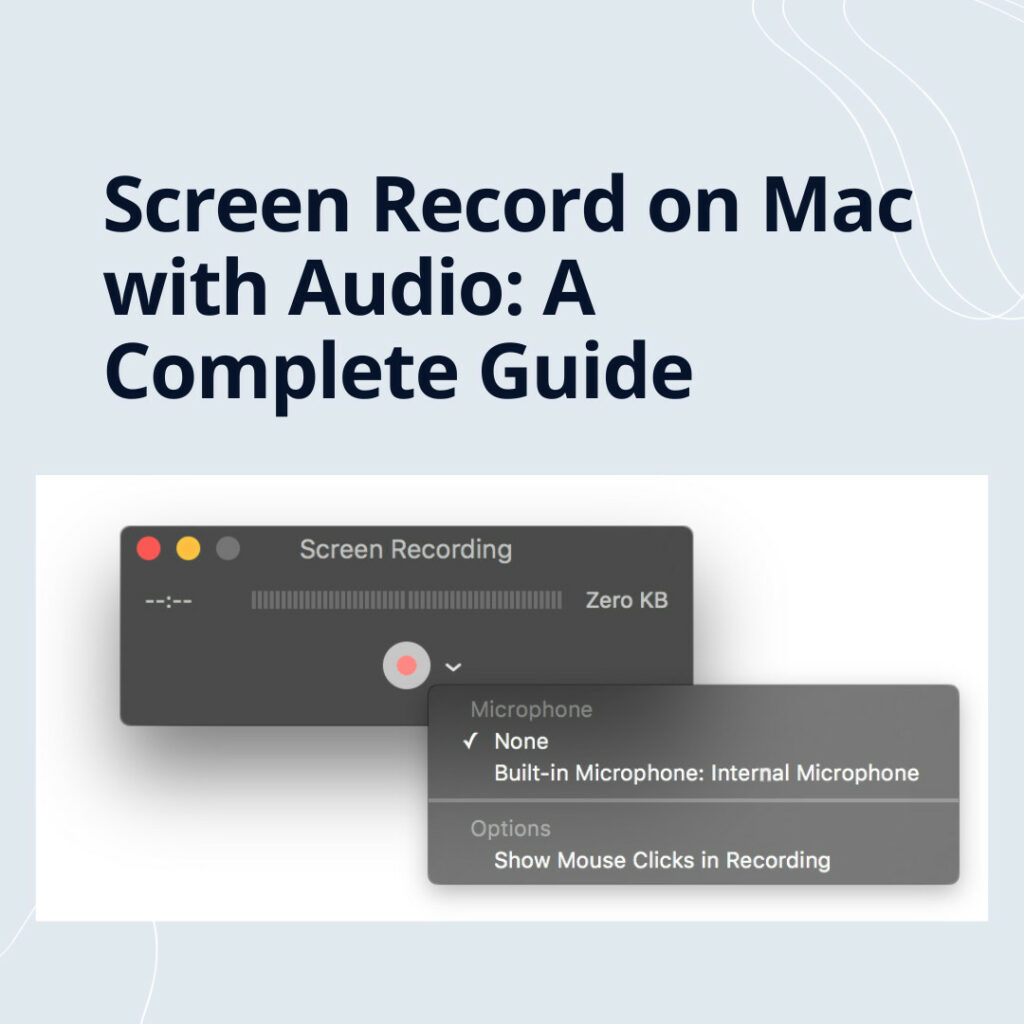
File>New Screen Recording. - Choose the Audio Source: Before you start recording, click on the arrow next to the record button. From the dropdown, choose the microphone or other audio source you want to use.
- Record Your Screen: Click the red record button to start recording. You can either drag to select a specific area of the screen or click anywhere to record the entire screen.
- Stop the Recording: Once you’re done, click the stop button in the menu bar or press
Cmd + Ctrl + Esc.
Voilà! Your recording will now open in a QuickTime window.
Third-party Applications for Enhanced Recording
While QuickTime is great for basic recordings, if you need more advanced features, several third-party applications might suit your needs:
- OBS Studio: This open-source software allows for screen recording and live streaming. It offers features such as setting up multiple scenes and using filters.
- ScreenFlow: Specifically designed for Mac users, ScreenFlow provides a rich editing suite, making it ideal for content creators.
- Camtasia: A professional-grade software, Camtasia not only records the screen but also offers robust video editing capabilities.
- Weezly: Weezly combines video recording with meeting scheduling features such as a booking page, timeslot picker, and group invites.
Features to Look for in Third-party Applications:
- Multi-track recording
- Built-in editing tools
- Ability to add annotations, transitions, and animations
- Export options in various formats and resolutions
- Integration with cloud storage or platforms like YouTube
Best Practices for Capturing Clear Audio
Capturing clean audio is just as crucial as getting a clear video. Here are some tips to ensure your audio is top-notch:
- Use an External Microphone: While Macs have decent built-in microphones, an external mic can drastically improve audio quality. Popular options include the Blue Yeti and Audio-Technica AT2020.
- Eliminate Background Noise: Record in a quiet environment. Close windows and doors and turn off noisy appliances.
- Test Audio Levels Before Recording: Make sure your voice isn’t too loud or too soft. Adjust the input levels accordingly.
- Speak Clearly: Enunciate your words and maintain a steady pace.
Screen Record on Mac with Audio: In Conclusion
Screen recording on a Mac with audio is simple and straightforward, especially with the tools and best practices available today. Whether you’re using the built-in QuickTime Player or opting for a third-party solution, ensuring clear audio will enhance your content’s quality and provide a more professional feel. So, the next time you need to capture something on your screen, you’ll be well-prepared!
Common FAQs About Screen Record on Mac with Audio
Q: Can I record system audio with QuickTime Player?
A: By default, QuickTime Player does not capture system audio. However, third-party applications like Soundflower can route system audio, allowing QuickTime to capture it.
Q: Is it legal to record my screen?
A: Yes, recording your screen is legal. However, ensure you have the rights to record content if it’s copyrighted. Always respect privacy laws, especially when recording video calls or meetings.
Q: Why is my recorded audio out of sync with the video?
A: This can happen due to various reasons, including software bugs or overloaded system resources. Consider closing unnecessary applications during recording or using a dedicated screen recording software.
EXPLORE MORE: What Does Scheduling via Video Widgets Looks Like?


