
Four schedulers in one.
Calendly is just one of them.
A booking page with your video on it, a Timeslot Picker that proposes times straight from your calendar, group invites people vote on, and a widget that books meetings on your website. All in every Weezly plan.
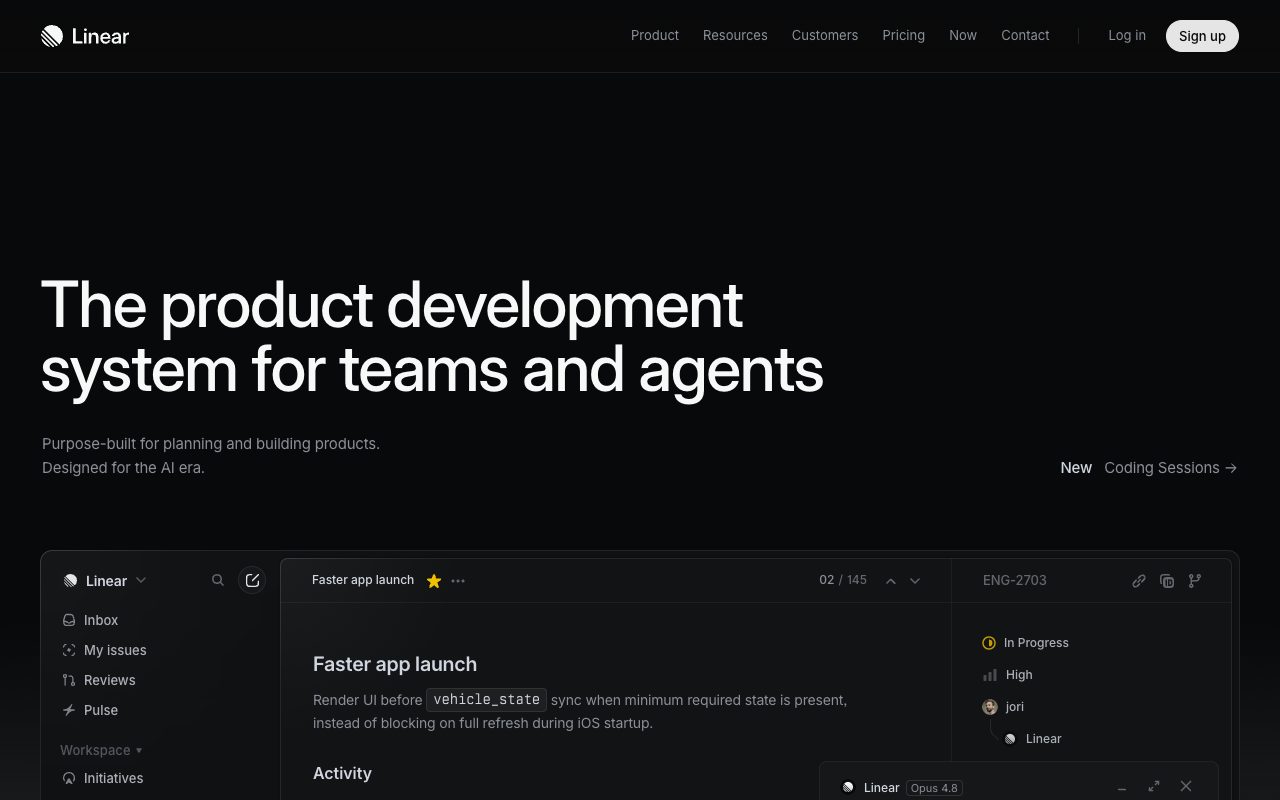
 Calendly
 30 minutes on Google Meet
 Google Calendar
 Outlook
 ExchangeGoogle Meet
 Zoom
Zoom Teams+ any CalDAV calendar
Every way a meeting gets booked, in one tool
A booking link only covers one situation. Weezly Scheduling covers all four: inbound links, proposed times, group decisions, and website visitors.
Your personal booking link, with a video of you on the page.
See how it worksClick open gaps in your own calendar. Clicks become a booking link.
See how it worksPropose times, let everyone vote, schedule on the winner.
See how it worksA floating video on your site that books meetings for you.
See how it worksThe booking page that sells before the meeting
Everything you expect from a Calendly link: real-time availability, timezone detection, Google Meet links. Plus the one thing Calendly cannot do: a video of you playing right on the page, warming up the prospect before they even pick a time.
 Google Meet link on booking
 Powered by Weezly Scheduling
 Sarah Chen booked · Thu 10:00 Synced


Propose times straight from your own calendar
The flagship. No other scheduler has it. Open your real week inside Weezly, click the gaps you want to offer, and hit create. Your clicks become a booking page with only those times on it.
See when teammates are free, before you propose
Send a calendar request to anyone. Once they accept, their busy blocks appear over your week: busy times only, never event details. Propose slots where you, Martin, and Eva are all free, tick them into the invitation, and the invitee books a meeting with all three of you at once.


 Google calendarOutlook calendar
Five stakeholders? Let them vote.
Multi-stakeholder deals die in the calendar shuffle. With a Group Invite you propose several times, every invitee marks the ones they can make, and you schedule on the slot with the most thumbs up. No reply-all threads, no doodling around.
Your website visitors book on the spot
Record a short video, or pick one from your library, and place a floating widget on your site. Visitors click it, your video plays with sound, and a booking calendar opens right next to it. They book a meeting without ever leaving your website.


Book right inside LinkedIn and Gmail
Stop the link ping-pong. The Weezly extension lives inside LinkedIn messaging, Gmail, and Outlook: insert any of your booking pages into the chat in one click, or propose a few times that land as live buttons in the email. Whatever gets booked lands on both calendars.
 LinkedIn
 GmailOutlook
 Marcus Lee
Sounds interesting. Can you walk me through it this week?

Sure! Pick any time that suits you:
marcus@acme.comHi Marcus, grab any of these. One click and it is on both calendars:
Talk soon,
Alex
AaEverything Calendly does, plus video everywhere
Booking links, polls, reminders: covered. Then Weezly adds the parts Calendly never built: video on the page, a widget that books from your website, and the Timeslot Picker.
WeezlyCalendlyCalendly capabilities are summarized at a category level. Check their current plans for specifics.
Scheduling is included. Not a subscription.
Calendly charges per seat for scheduling alone. Every Weezly plan ships all four schedulers alongside the whole outreach platform.
Scheduling included · 21-day free trial · cancel anytime
Frequently Asked Questions
From video to booked meeting.
Your booking page lives on every video you send. Viewers watch and schedule in one seamless flow.